1. Re move the rear protector. There is a screw right in the middle of it (Figure #1). Once you remove the screw, remove the plate. Although not shown, I reinstalled the screw to its place once i had removed the plate (Figure #2).
Figure #1:
 |
| Shows with screw |
Figure #2:
 |
| Plate removed without screw |
2. Open the seat. There are two screws to remove (on my 1988). One is located with the passenger foot rests...you will have to fold them down to to see them (Figure #3). The second is located just under the luggage rack (it's a big one; Figure #4).
 |
| Shown with passenger foot rest folded down |
Figure #4:
 |
| Big screw...no pun intended. |
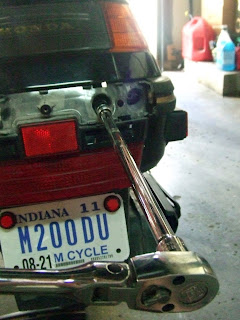
3. Remove the bolts. They can be found under the rear protector. Figure #5 shows that I was using a screwdriver, but a 10mm socket will work for both bolts. Figure #6 shows me using a socket.
Figure #5:
 |
| Using a screwdriver is okay...don't forget the OJ |
Figure #6:
 |
| 10mm scoket works best |
4. Once the screws have been removed, you should be able to work the body panels off. They slide off over the passenger foot rests.
5. Repeat for the other panel, if you have not already removed it.
6. Now that the panels are removed, there is one one more plate to remove (show in Figure #7).
Figure #7:
 |
| Both panels removed |
7. The final plate is held in place by the bolts, so removing it should be as easy as working it out from underneath the luggage rack (shown in Figure #8).
Figure #8:
8. Your scoot should now look like this (from the back):
9. I think it is a good idea to return the screws / bolts to their original location so you don't lose them. Here are a few reminders of where they go:
 |
| Bolts |
 |
| Screw (luggage rack) |
 |
| Screw (foot rest) |
Now that you have the panels removed, you can move on to do other things such as remove the muflfler, fender, and/ or shock absorber.


